The Middle East
To Be A Desert Rat
Chapter 3
On the 3rd November there were signs, at last, that the enemy front facing El Alamein was about to crack. At 1.05am on the 2nd November the final infantry attack, codenamed Operation Supercharge, was made by the 151st (Durhams) Infantry Brigade supported by the 28th New Zealand Battalion of Maoris, and the 152nd Infantry Brigade from the 51st (Highland) Division supported by the 133rd Lorried Infantry Brigade of Royal Sussex battalions. This attack achieved all its objectives, which were then exploited by the New Zealand Division’s 9th Armoured Brigade, although at great cost. Finally between 11am until 1pm one of the fiercest tank battles of the desert war took place between the armoured brigades of X Corps and the remaining tanks of the 15th and 21st Panzer Divisions, together with the lighter tanks of the Littorio Division. Events had forced the Afrika Korps to counter-attack in daylight across open ground in front of the Aqqaqir Ridge. Although these attacks were well co-ordinated with artillery support, Stuka dive-bombers and twenty-four 88mm guns, the British enjoyed a strong tactical position, and the Allied fighter cover made short work of the Stuka attacks. It was an unequal battle, and by the end of the day the Panzerarmee Afrika was down to 35 panzers and 20 Italian tanks, having lost over 100.
Although British losses were not insignificant, they could afford to lose tanks at a far higher rate than their opponents, whilst the 8th Armoured Brigade had not been heavily involved and was still strong, and the 22nd Armoured Brigade had not been involved at all. It was at this stage that the 7th Armoured Division was ordered to prepare for the break-out and pursuit, which was felt to be imminent. At dawn on the 4th November the hill dominating the battlefield, the Tel el Aqqaqir, was occupied by the 7th Argylls without suffering any casualties, to reveal that the whole Afrika Korps had withdrawn from the Aqqaqir Ridge during the night, and that the battle of El Alamein was over.
At 6.30am the 22nd Armoured Brigade felt their way through the 5th Indian Infantry Brigade at the southwest corner of the Operation Supercharge salient and turned south down the Rahman Track. Meanwhile 131 Brigade threaded its way through the minefields and the numerous traffic jams behind the front line in the salient. The 4th Light Armoured Brigade had been lent to the 2nd New Zealand Division to replace the shattered 9th Armoured Brigade, so 7th Armoured Division consisted of only two brigades, the 22nd Armoured Brigade and the 131st (Queen’s) Lorried Infantry Brigade.
Just after 8am 22nd Armoured Brigade came under fire from 88mm guns sited to cover the track, and when two troops of the 11th Hussars endeavoured to find a way past this enemy force towards the west, it was found that they had bumped into the Ariete Division, most of the remaining Italian XX Corps artillery, elements of the Littorio and Trieste Divisions, and that they were in touch, on their northern flank, with the remnants of 15th Panzer. It became obvious that such a force could not be side-stepped, so 131 Brigade closed up in support, the artillery wheeled into position, and preparations were made for a set-piece battle. However, although an exchange of fire continued all morning and well into the afternoon, neither side was willing to make a positive move, until eventually the Italians and the few Germans from the 10th Company, Panzergrenadier Regiment 104, who had opposed the attacks on the January and February minefields, fell back and the 22nd Armoured Brigade tanks drove forward to collect about 450 prisoners.
Next day the 7th Armoured Division approached their objective of El Daba, but realised from the 11th Hussars’ reconnaissance troops that El Daba had been evacuated and would inevitably be captured by 1st Armoured Division, who were pursuing the Axis forces along the coast road. Without waiting for orders General Harding directed 22nd Armoured Brigade to turn back into the desert and drive south-west by west so as to hook round beyond Fuka, leaving 131 Brigade to occupy the airfield in the El Daba area. The night of the 5th/6th November was spent, therefore, nose to tail in an uncharted minefield, followed by heavy rain next morning.
22nd Armoured Brigade engaged what was left of the German armour and a fierce battle ensued, into which the left flank of 131 Brigade almost blundered, but was fortunately and forcibly diverted by the Divisional Commander in person. This was not a very happy first contact with their new commander. Luckily, on hearing that the Brigade was to come under his command permanently, he had made a mental reservation to initiate them as gently as circumstances might permit! This was followed by more heavy rain the next night, which completely bogged down all units in the desert, and it was not until the 8th November that 1/5th Queen’s occupied the airfield, their ‘B’ Echlon having reached it first, with Capt Packer and CQMS Freddie King driving on to the airfield at one end whilst the Germans were withdrawing from the other end. It was not recorded which party was the most surprised! That same day an Anglo-American army under General Dwight Eisenhower landed on the west coast of North Africa around Casablanca, Oran and Algiers, and the outcome of the war in Africa was never really in doubt from that day on.
While 1/5th Queen’s were handing over the El Daba airfield to the RAF, the rest of the Brigade had been hurrying to catch up with 22nd Armoured Brigade, who had received orders to capture the Sidi Haneish airstrips, but who were now very short of petrol. This shortage was partially alleviated by grounding 131 Brigade temporarily on the Fuka escarpment so that all the Division’s logistic efforts could concentrate on keeping the armour moving. On the 9th November the situation improved and 131 Brigade were able to cover over 70 miles on a hard, fast surface, and the Division, by now the most southerly of the pursuing British formations, was directed to make a left hook passing well south of Fort Capuzzo in the hope of cutting off the German rearguards keeping open Halfaya Pass for the retreating Axis forces. 22nd Armoured Brigade were within a few miles of achieving this, and in fact a squadron of the 1st Royal Tank Regiment fired ineffectually at the last enemy trolley train pulling out of Capuzzo before the rain came down again, petrol could not be brought up, so the enemy escaped.
However, 131 Brigade was able to close up to the armour, and on the 11th November 1/5th Queen’s led the Brigade through the frontier wire into Libya. ‘C’ Company of the 1/7th Queen’s was attached to 22nd Armoured Brigade to help in the collection of prisoners, and together with a composite company of the 1st Rifle Brigade entered Bardia. They found it empty but extensively mined and booby-trapped. Unfortunately the company commander, Capt J.R. Mills, was killed by a booby-trap, only two and a half weeks after escaping from the Italians during the incident when Lt Col Burton had been killed. After another long advance of well over 100 miles to an area just east of El Adem, the Brigade prepared to assault the Tobruk perimeter on the 13th November. Instead the enemy withdrew during the night, and the Queen’s entered the battered town and port unopposed.
Tobruk was a most important asset. Without the port the further supply of an adequate pursuit force was impossible, and it was essential to get it operating again quickly. There followed an inevitable pause, whilst the 1/6th Queen’s assisted in getting the docks working and unloaded stores from incoming shipping, an appropriate task for a Bermondsey battalion, and the reason for their selection. The other two battalions guarded the eastern and western approaches, locating and placing picquets on dumps of captured enemy materials. The tanks of the 22nd Armoured Brigade were in desperate need of repair, and so were left back at El Adem, but the 4th Light Armoured Brigade rejoined the Division and was pushed forward in order to keep up the pressure on the retiring enemy rearguards. During the stay in Tobruk Brigadier Stamer fell ill and Lt Col East assumed temporary command of the Brigade. General Montgomery visited Tobruk and met Lt Col East during this period.
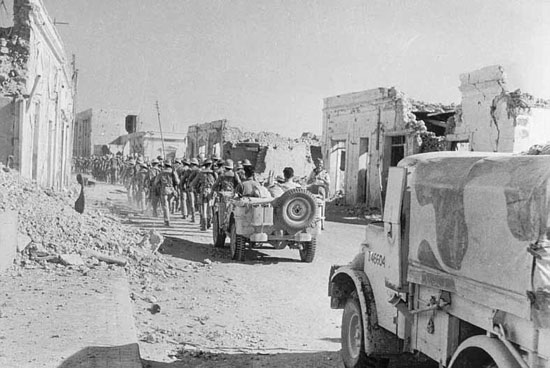
1/6th Queen's enter Tobruk to open the harbour.
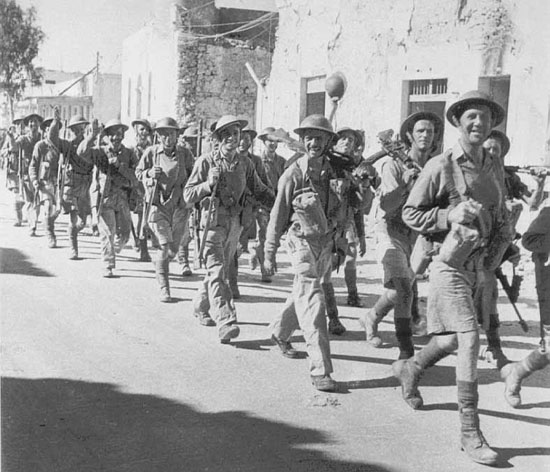
Soldiers of 1/6th Queen's passing through Tobruk on their way to the docks.
« Previous ![]() Back to List
Back to List ![]() Next »
Next »
Related
